Recently, I was working on a PowerShell script that would access all our clients’ Azure environments and gather metrics from them. While testing this, I used my account, which prompted me to get MFA credentials for every tenant. While this worked for my development and testing of the PowerShell script this wasn’t going to work for automating the script with Azure Automation (or just scheduling the PowerShell script in Task Scheduler). To get this to work, it took a shocking amount of research to figure out how to set up an Entra ID Service Account and get the other tenants to trust the account. So, I’m documenting everything that I needed so that it is in one place so that I can find it later and so that others don’t have to go through the research that I had to do.
Now that I have the process down, it’s pretty straight forward. For our example we’ll assume we have two Azure tenants. “OurTenant” will be our tenant, and “ClientTenant” will be our customer’s tenant.
The first thing that you need is to be a global admin in “OurTenant”. This is needed to properly setup our App registration and Enterprise Application.
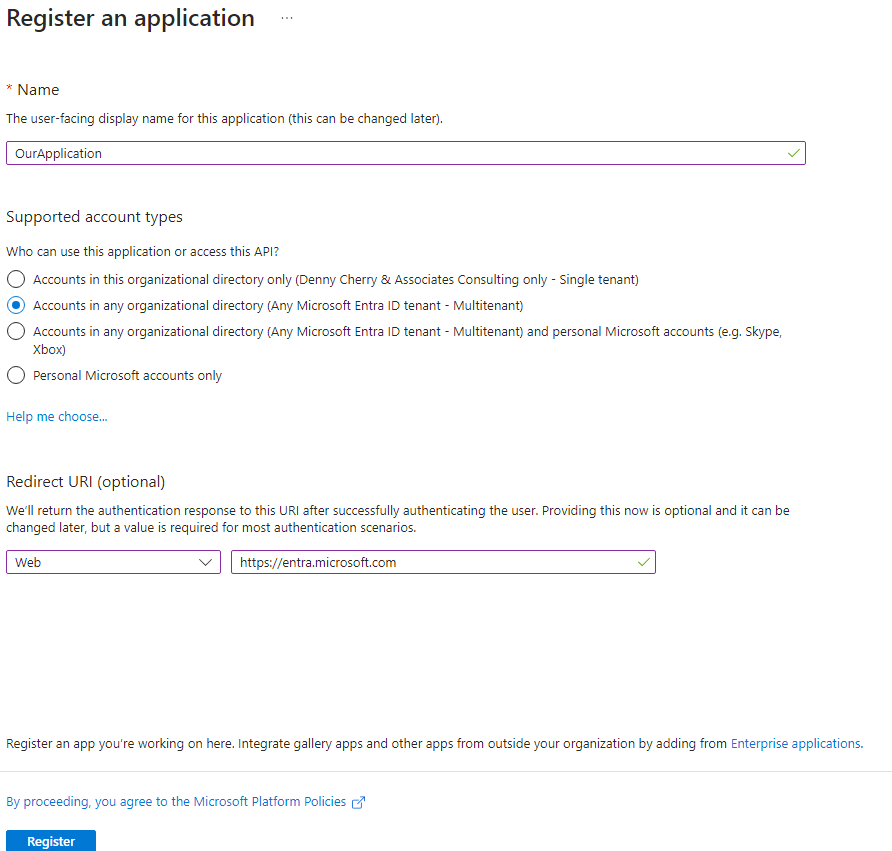
The first thing to do in OurTenant is set up an application within your Entra ID section of the Azure portal. To do this search for “AAD” in the Azure Portal, and select Entra ID. Once Entra opens, select “App registrations”. Fill out the name of your application, and select “Accounts in any organizational directory – Any Microsoft Entra ID tenant – Muntitenant” as shown below. In the Redirect URI put in https://entra.microsoft.com (or any other place that you want users redirected to after they approve the application). Once everything is filled out, click Register.
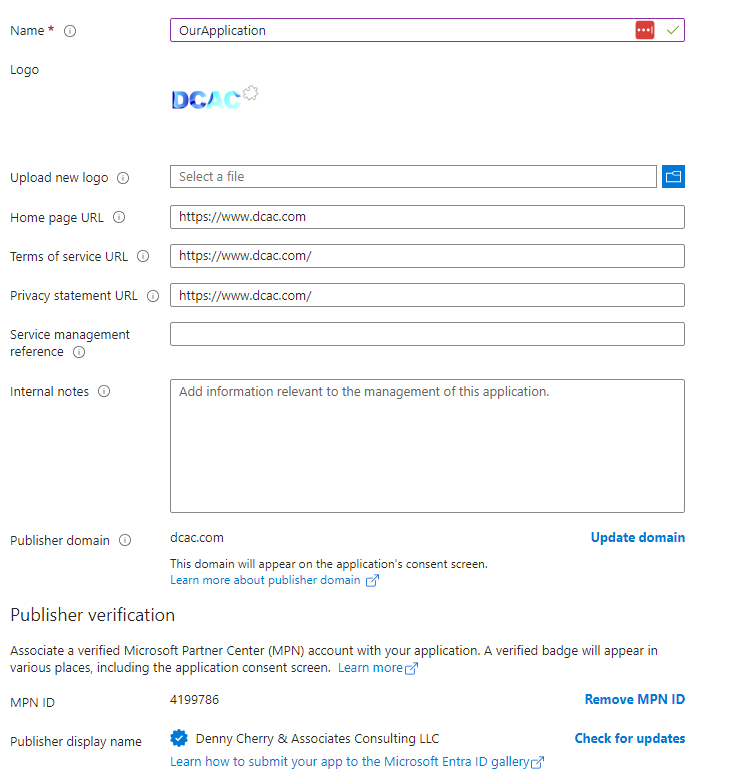
After Entra has created the App registration, select it and open it’s details. Under “Manage” in the right hand pain, select “Branding & properties”. Select a logo for the application and enter the home page, TOS and Privacy statement as needed. You’ll also need to enter your companies MPN ID at the bottom (I’ve already done this so your screen will look a little different) than the screen shown below. Once the changes needed are entered, click the “Save” button at the bottom of the screen.

The next thing to do is setup a secret which your application can use to log in to Azure. To do this, select “Certificates and secrets”. Once this is open select the “Cleint secrets” tab and then click “New client secret”. Give the client secret a name and a duration until the secret expires.
Once that’s done you’ll see the new secret listed like I’m showing here. Be sure to save the value that’s listed here as it won’t be shown again. Take these values and store them in Azure Key Vault so that the are securly stored and retreivable. (Don’t worry about me leaking values here, you can’t see all of the value

This should be everything that you need to setup in “OurTenant”. Now we need to setup “ClientTenant” so that it trusts our App registration (aka. Service Account).
A global administrator for the “ClientTenant” needs to go to the below URL (correct the <ClientId> with the Application (client) ID from the properties of your App Registration.
https://login.microsoftonline.com/organizations/oauth2/v2.0/authorize?response_type=code&response_mode=query&scope=openid&client_id=<ClientId>Once this has been done, the client will now have an application in their Enterprise Application. This will have the same name as your Application that our setup in “OurTenant”. At this point the client tenant can grant IAM permissions as needed to the enterprise application.
At this point your PowerShell script can authenticate using the ServicePrincipal flag of Connect-AzAccount as shown below.
 $ApplicationId = Get-AzKeyVaultSecret -VaultName $KeyVaultServer -Name "ApplicationId"  -AsPlainText
        $Secret = Get-AzKeyVaultSecret -VaultName $KeyVaultServer -Name "Value"  -AsPlainText | ConvertTo-SecureString -AsPlainText -Force

        $connectCreds = New-Object -TypeName System.Management.Automation.PSCredential -ArgumentList $ApplicationId, $Secret
        Connect-AzAccount -ServicePrincipal -Credential $connectCreds
The biggest catch that I’ve seen with using a Service Principal is that Get-AzTenant only returns the current tenant that you are in. When using a normal Entra ID Account you get back all the tenants that you have access to. However a Service Principal only returns one record from Get-AzTenant, so you’ll need to keep a list of the tenants that you want to access (I use an Azure SQL DB database table in this case).
Hopefully this helps others who are trying to do this.
And don’t forget to rotate your secret value regularly.
Denny