Back when Azure and Azure Active Directory got Windows InTune pushing down setting, and specifically oddball settings changes were complex. In the newest release of InTune that is accessible via Azure and Office365 things have gotten much easier. There used to be a  major gap, in that you couldn’t run PowerShell. You had to convert it into an EXE, then package it via an MSI and upload the MSI to Azure. Short story, it wasn’t easy.
Now, however, you just need to sign your PowerShell (which was much easier than I was expecting) and upload it to the Azure portal. Then tell Azure which users are assigned to use the PowerShell. After that give the system some time to push to your users, and the PowerShell will be run against the users as needed.
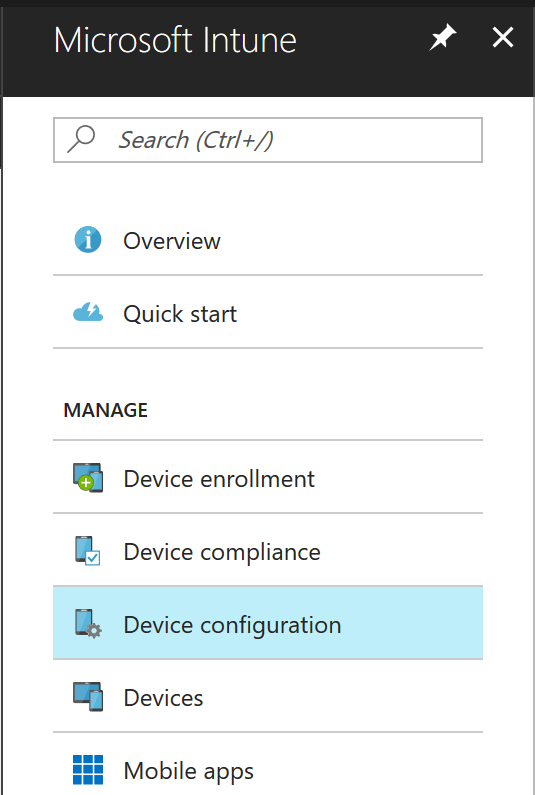
In our case, we’ve got a non-standard VPN configuration, but using PowerShell, I was able to create the VPN connection on users computers easily enough. Let’s look at how it was done. The first step in Azure it two bring up “InTune” from the service list.
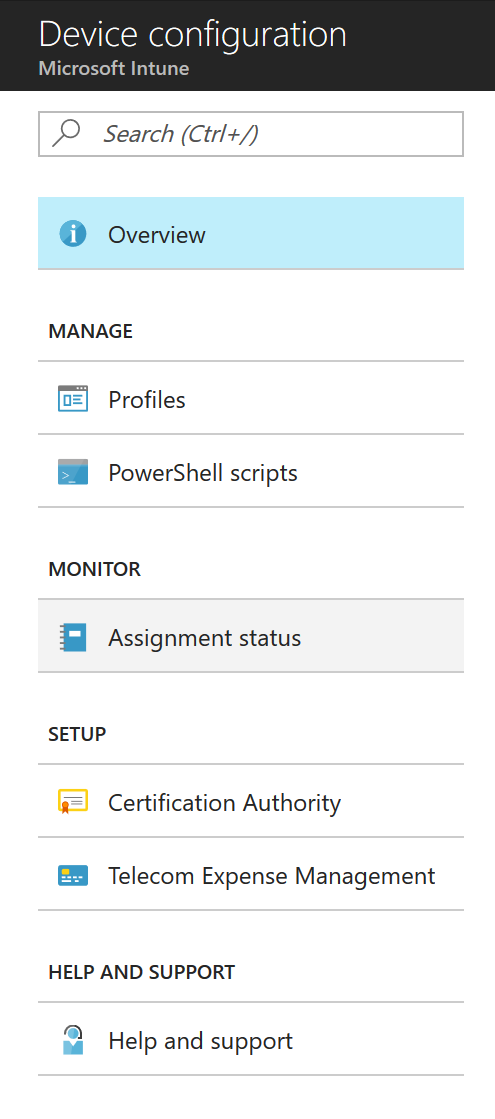
After opening up the Intune menu select the Device Configuration option from the Intune menu. This will give you access to where you’ll upload your PowerShell scripts.
The next step will be to setup a Certificate Authority internally. While this isn’t needed, it’s recommended so that all the users get the CA configuration. From what I’ve been able to tell with a CA in place (and duly registered and synced with Azure) multiple users can sign code and make it available for download and execution by users. For a more extensive IT shop this is going to be critical. For smaller shops, this may not be needed, but it will make life easier.
If you opt not to setup a CA within the network and sync it to Azure, then you’ll need to upload the certificate being used to sign code, and you can only upload a single certificate.
Once the CA is setup and Azure AD sees it (via AD Sync I assume) the menus changes so you can download the sync software. This took about 10 minutes for me when setting this up.
These changes are all done using the “Certification Authority” menu option that you see under “Device Configuration.”
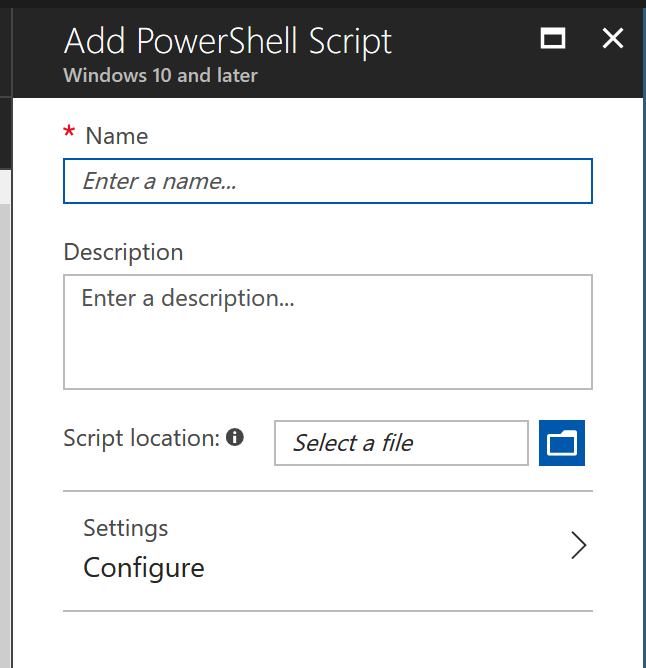
Once the Certificate Authority is setup, you can go into the PowerShell scripts section of the screen. From there just click the “Add” button to add a PowerShell script to Intune.
 Once you’ve added a PowerShell script you can add a name for a PowerShell script and point Azure to the signed PowerShell script so it can be run by users. There’s no much under “Settings” to work with.
The first setting is, is this a user-level script or a system level script. By default, scripts are run by the system account, but there’s a lot of cases where you want things to run at the user level instead, so you’ve got both options available. My script was written as a user-level script, so I set this to “Yes.”
The second setting allows you to force the system to check if the code is signed by a known code-publisher or if InTune doesn’t need to be checked or not. When I was working with this, I left this at “No,” and everything worked exactly according to plan (I also had a CA setup and synced with Azure and Intune).
After creating the script, the Portal should take you to the details of that specific script. The next step would be to change to the “Assignments” page. This is where you configure which domain groups will have access to download and run the script.
When you select “Assignments,” you can select as many groups as are needed to assign to this specific script. Groups can be synced from on-premises, groups which are AAD/O365 only, or even dynamic groups, so users are added automatically based on how settings for the users are configured.
It may seem like there are a bunch of steps to get this completed, but realistically once the PowerShell script is written, it took about 5 minutes to setup the script to be pushed out. After that, it was just a matter of waiting for users systems to refresh and pick up the change.
Denny
The post Managing VMs via Azure Active Directory just got a lot easier appeared first on SQL Server with Mr. Denny.


