If you have an extremely popular WordPress site you want to optimize it to get each page load on it as fast as possible. One way to do this, is to change the way that Cron works in WordPress. We can do this by making it to so Cron is checked every few minutes instead of every time a visitor views your page.
How Cron Works
Cron in WordPress is a little different than Cron in Linux. In Linux there’s a file called Cron.tab that stores how often jobs are run. WordPress has its own version of Cron that is stored within the WordPress database.
By default, with an “out of the box” install of WordPress Cron runs every time a page is viewed on your website. So when there is a task to run, the users page request may be slightly delayed while cron is running.
The thing to remember about Cron in WordPress is that is isn’t exact in its timings. Because Cron only runs when a page is viewed, if there’s no viewers on your website, then Cron won’t run until the next viewer of your website.
Moving Cron to Azure Automation
For sites where you don’t want to tie the Cron process to page views, either because you want to reduce the load on your site, or you want to increase the frequency of when Cron runs, you can do this pretty easily.
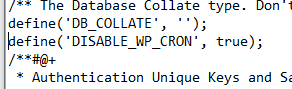
The first step is to tell WordPress to stop running Cron on every page load. You do this in the wp-config.php. You do this by simply adding a new line into this file with the text “define(‘DISABLE_WP_CRON’, true);” as the text of the line, as shown in this image from our website’s wp-config.php.
At this point there’s basically no Cron on your website, so we want to fix this. We do this via Azure Automation as we don’t want to stand up a VM to simply fire off Cron on our website. First we will need to log into the Azure portal at portal.azure.com. From there select “Automation Account” as the service that you want to use. If you don’t have an Automation Account you’ll want to set one up. If you already have one you can either use that one, or a new one.
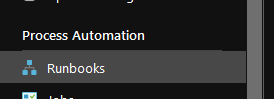
Select the Automation Account that you want to use to trigger Cron, and then select RunBooks from the menu on the left. It should be the first thing listed under Process Automation (unless things have changed since July, 2020, it may have moved).
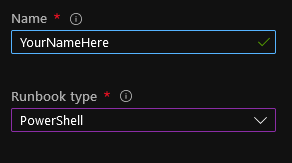
Click “Create a runbook” at the top to create a new runbook. Give the runbook a name (don’t forget that you can’t use spaces) and set the type to “PowerShell” and then click the “Create” button down at the bottom.
Give the page a minute and the editor will open. The code that we want to run is pretty straight forward. We simply call the wp-cron.php page on your website, and that will run any pending cron tasks.
$WebResponse = Invoke-WebRequest "https://www.yoursite.com/wp-cron.php" -UseBasicParsing
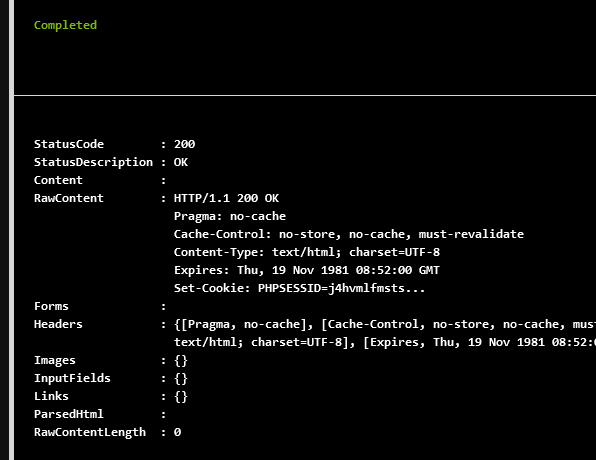
$WebResponseOnce you have the RunBook created you’ll want to test it to make sure that the code works as expected. If you click the “Test Pain” button you can then run the code in the Azure Automation environment. It should return something like the screenshot that’s shown below.
Once that is done you’ll want to bind some schedules to your Cron. Now something to keep in mind is that you only get 500 minutes of Azure Automation each money, and there are ~730 hours in each money. So if you schedule this to run every hour, it’ll cost you a few cents (US) per month to have this job.
When I set this up, I configured the job to run 6 times an hour (every 10 minutes) so I had 6 schedules created as the most often a schedule will run is every hour. This solution caused the monthly cost to be about $6.
Frequency
How often you might need to run the Cron is really up to you. Cron controls pretty much anything scheduled. That includes publishing new posts and pages, running any automated backups that you have configured in WordPress, or any scheduled jobs from plugins. So depending on your needs to may want to run this more than every 10 minutes or less than every 10 minutes. It’s really up to you and the needs of your website.

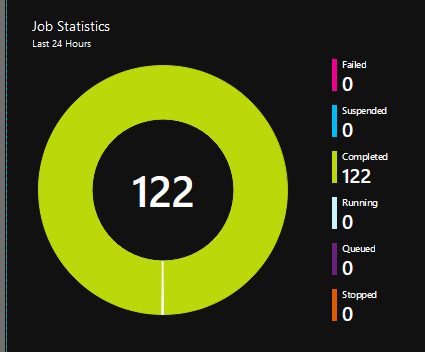
Based on the frequency you have this setup, you should get results of the overview blade for the Automation Account pretty quickly showing that the job is running successfully. If it’s not, a little troubleshooting will be needed, but this was a pretty quick change over for me.
Denny